 Save to Pinterest
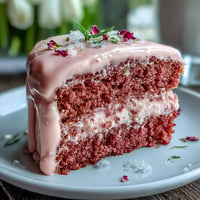
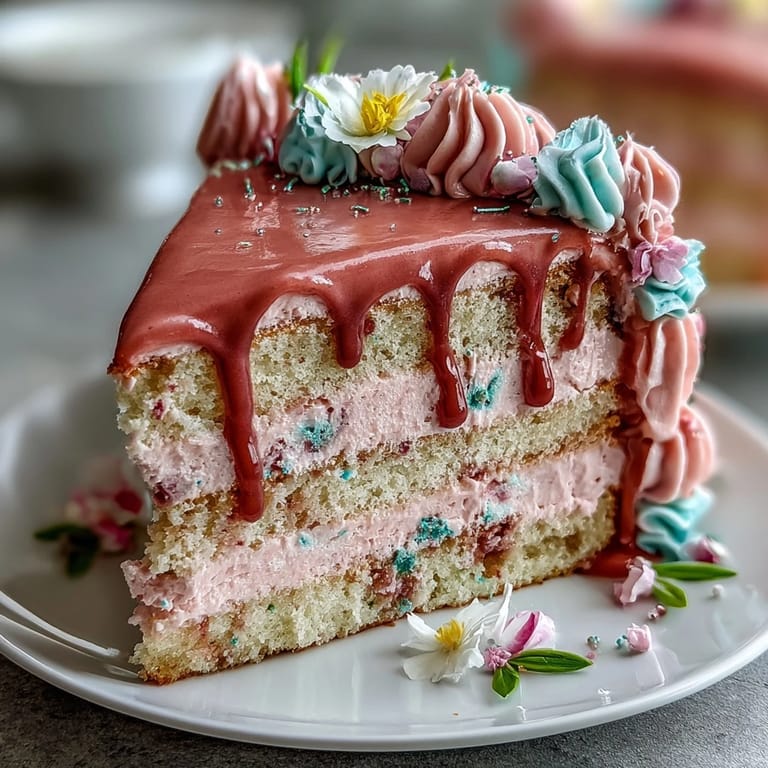
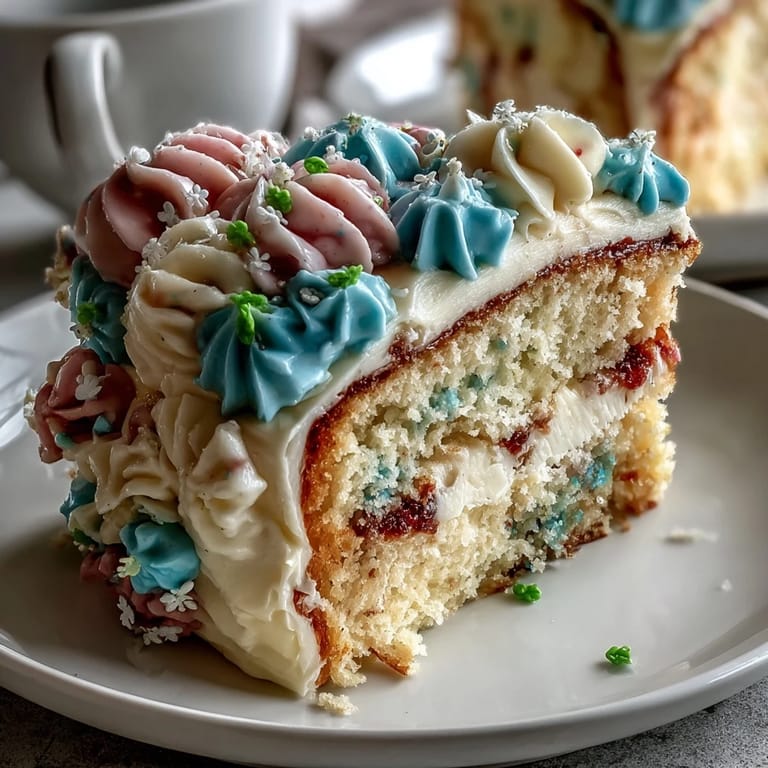
 My sister called me three weeks before her birthday asking if I could make her a cake. Not just any cake, but something spring-like with soft colors that matched the garden she'd been planting all winter. I'd never piped flowers before, but standing in my kitchen that afternoon, butter softening on the counter, I realized this was exactly the kind of challenge I needed. The vanilla cake came together smoothly, and by the time those pastel buttercreams were swirled into blooms, I understood why she'd asked.
I'll never forget the moment my sister walked into the kitchen and just stopped. The afternoon light hit those pale pink and lavender swirls, and she got that quiet smile people get when something small becomes a memory. She didn't say much, just pulled out her phone to photograph it before we even cut into it. That cake taught me that presentation matters not because of perfectionism, but because it shows someone you cared enough to try something new for them.
Ingredients
- All-purpose flour (2 ½ cups): This is your cake's foundation, and sifting it with the baking powder ensures even rise and tender crumb without dense pockets.
- Baking powder (2 ½ tsp): The silent hero that keeps your cake from sinking in the middle, but don't exceed this amount or you'll taste metallic notes.
- Salt (½ tsp): A pinch that amplifies vanilla and balances sweetness so the cake doesn't taste one-dimensional.
- Unsalted butter (1 cup, room temperature): Room temperature is non-negotiable here; cold butter won't cream properly, and you'll end up with a heavy cake instead of the tender crumb you're after.
- Granulated sugar (2 cups): This dissolves into the butter during creaming, which is what traps air and gives the cake its delicate texture.
- Large eggs (4, room temperature): Room temperature eggs incorporate smoothly without breaking the emulsion, so take them out of the fridge at least an hour before you start.
- Pure vanilla extract (1 tbsp): Use pure extract, not imitation; the difference is subtle but makes the whole cake taste more sophisticated and less one-note.
- Whole milk (1 cup, room temperature): The acidity in milk reacts with baking soda to create a tender structure; cold milk can shock the batter and cause dense pockets.
- Unsalted butter for buttercream (1 ½ cups, room temperature): The buttercream must be soft enough to beat to clouds without being greasy, so this ingredient really does deserve its own spotlight.
- Powdered sugar (6 cups, sifted): Always sift this before measuring; packed powdered sugar will make your buttercream grainy and stiff instead of silky and spreadable.
- Gel food coloring: Gel colors won't thin out your buttercream the way liquid colors do, which means your pastels stay stable and don't leak into each other on the cake.
Tired of Takeout? 🥡
Get 10 meals you can make faster than delivery arrives. Seriously.
One email. No spam. Unsubscribe anytime.
Instructions
- Set yourself up for success:
- Preheat your oven to 350°F and grease those three pans while it warms; lining them with parchment paper takes an extra thirty seconds but prevents the frustration of stuck edges. Lay out all your ingredients on the counter so you're not hunting for things mid-stream and losing your rhythm.
- Build the dry mix:
- Whisk together flour, baking powder, and salt in a medium bowl; this distributes the leavening evenly and prevents dense spots in your finished cake. Take your time here, about a minute of whisking, so everything is well combined.
- Cream butter and sugar:
- Beat softened butter with sugar on medium-high speed for 3–4 minutes until the mixture is pale, fluffy, and noticeably lighter in color; this aerates the batter and is the secret to a tender crumb. You'll hear a change in the mixer's sound when you've beaten in enough air, a kind of satisfied whirring instead of grinding.
- Incorporate eggs gently:
- Add eggs one at a time, beating well after each addition so they fully emulsify into the butter mixture; if you add them all at once, the batter can look broken and curdled. This patience pays off with a smooth, creamy base that holds air like a dream.
- Alternate wet and dry:
- Add flour mixture and milk in three additions, starting and ending with flour; this prevents overmixing, which develops gluten and makes your cake tough. Mix only until you can't see dry flour anymore, then stop, even if it doesn't look perfectly smooth.
- Divide and bake:
- Distribute batter evenly among the three pans and smooth the tops with an offset spatula; even layers bake more evenly and stack better. Bake for 25–30 minutes, checking at 25 by inserting a toothpick in the center; it should come out clean or with just a crumb or two clinging to it.
- Cool with intention:
- Let cakes rest in the pans for 10 minutes so they firm up enough to handle without breaking, then turn them out onto a wire rack to cool completely. This step matters; turning them out too early results in cracks, and trying to decorate warm cake is like frosting a puddle.
- Make the buttercream:
- Beat softened butter alone for a minute until creamy and pale, then gradually add sifted powdered sugar with milk, vanilla, and salt; this gradual approach prevents lumps and keeps everything smooth. Beat for 3–4 minutes total until fluffy and light, which means you've beaten in enough air to make piping easier.
- Tint your colors:
- Divide buttercream into separate bowls and use gel coloring, adding just a tiny dab at a time; gel colors are concentrated, and it's easier to add more than to lighten an overly bright batch. Stir gently until the color is even, and resist the urge to over-mix, which can make buttercream grainy.
- Layer and crumb coat:
- Place the first cake layer on your serving plate, spread buttercream on top, repeat with the second layer, then crown with the third; use an offset spatula and aim for even, thin layers so the cake doesn't topple. Apply a thin crumb coat of buttercream all over the entire cake with a clean spatula, which seals in crumbs and gives your decorations a clean base.
- Chill and set:
- Refrigerate the crumb-coated cake for 20 minutes so the base layer firms up and won't drag and tear when you pipe over it; this step feels optional but absolutely isn't. A firm foundation means your floral designs stay crisp and don't blur into the base.
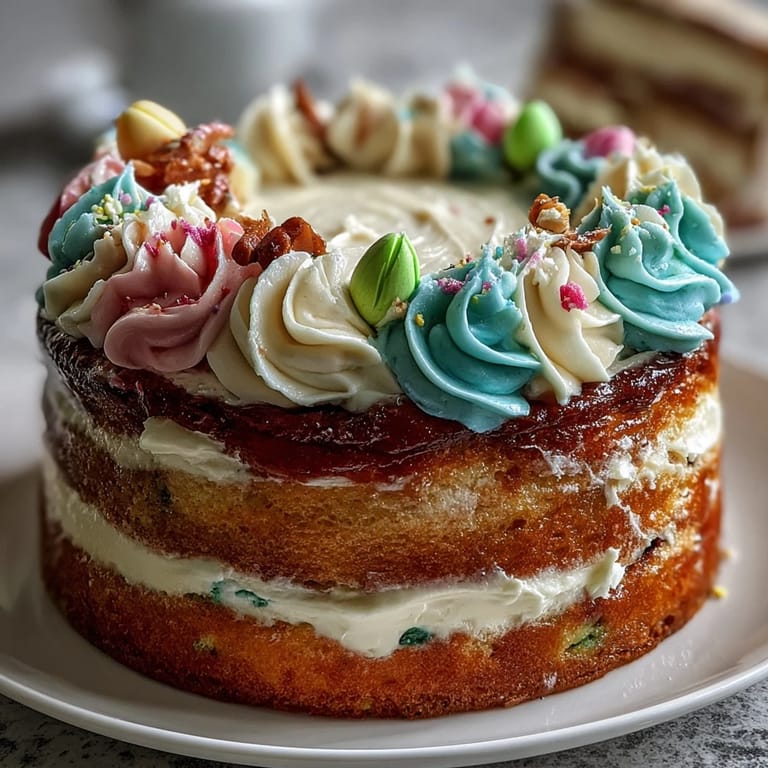
- Decorate with confidence:
- Fill piping bags with different pastel buttercreams and assorted tips, then pipe flowers, swirls, and details all over the cake; there's no single right way, so trust your instincts and layer colors playfully. If you're nervous, sketch designs lightly with a toothpick first, or remember that imperfect blooms look more natural than symmetrical ones.
- Final chill before the moment:
- Refrigerate the finished cake for 15–20 minutes so the buttercream sets and holds its shape when sliced; this also keeps the colors vibrant and prevents everything from sliding around on the plate. Pull it from the fridge about 10 minutes before serving so the cake itself is cold but the buttercream is soft enough to eat easily.
 Save to Pinterest
 Watching someone's face light up when they see a cake you made from scratch is a kind of magic that doesn't need words. My sister ended up saving a slice in her freezer just to look at it for a few days before bringing herself to eat it, which tells me everything about what happens when you combine sugar and intention.
Scaling and Substitutions
If you only have two 8-inch pans instead of three, you can absolutely make this cake in batches; bake the first two layers, let them cool and cool the pans, then bake the third layer using the same pans. The process takes longer, but the result is identical, and sometimes the unhurried pace actually makes the whole experience feel less stressful. For lemon or almond variations, swap out the vanilla extract or add 1 teaspoon of almond extract in addition to the vanilla; these subtle shifts transform the cake into something that feels like a completely different recipe.
Storing Your Cake
Keep this cake in a covered container in the refrigerator for up to three days, and the buttercream actually holds its shape better when slightly chilled. If you want to bake ahead, you can make the cake layers a day early, wrap them individually in plastic wrap, and store them at room temperature until you're ready to frost. The buttercream itself can be made up to two days ahead and kept covered in the fridge, then brought to room temperature and re-beaten for one minute to restore its spreadable texture.
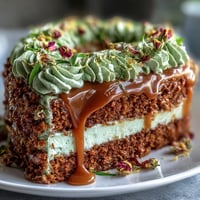
Making Pastels Work for Your Party
Pastel colors feel spring-like, but they also work beautifully for baby showers, Easter celebrations, or any event where soft, gentle aesthetics matter. If you're worried about how much gel coloring to use, start with just a toothpick dab and stir it in; you can always add more, but you can't remove color once it's mixed. The beauty of this approach is that every batch of buttercream you tint will be slightly different, which means your floral designs will have natural variation instead of looking mass-produced.
 Save to Pinterest
 This cake exists somewhere between the simple pleasure of vanilla and the joy of creating something that looks like art. Once you've made it once, you'll understand why people ask for it again and again.
Recipe FAQs
- → What makes the buttercream pastel colored?
The buttercream is tinted using gel food coloring in soft shades like pink, yellow, lavender, green, and blue to create delicate pastel floral decorations.
- → How should the cake layers be baked to ensure even texture?
Divide the batter evenly among well-greased pans and bake at 350°F until a toothpick comes out clean for moist, tender layers.
- → Can edible flowers be used for decoration?
Yes, edible flower petals can be added as a garnish to enhance the spring floral theme and add a natural touch.
- → What is the best way to apply the buttercream layers?
Spread buttercream evenly between each cooled cake layer, then apply a thin crumb coat around the cake before piping floral designs.
- → How long should the cake be chilled before serving?
Chill the assembled cake for 15–20 minutes after decorating to let the buttercream set for clean, firm designs.