 Save to Pinterest
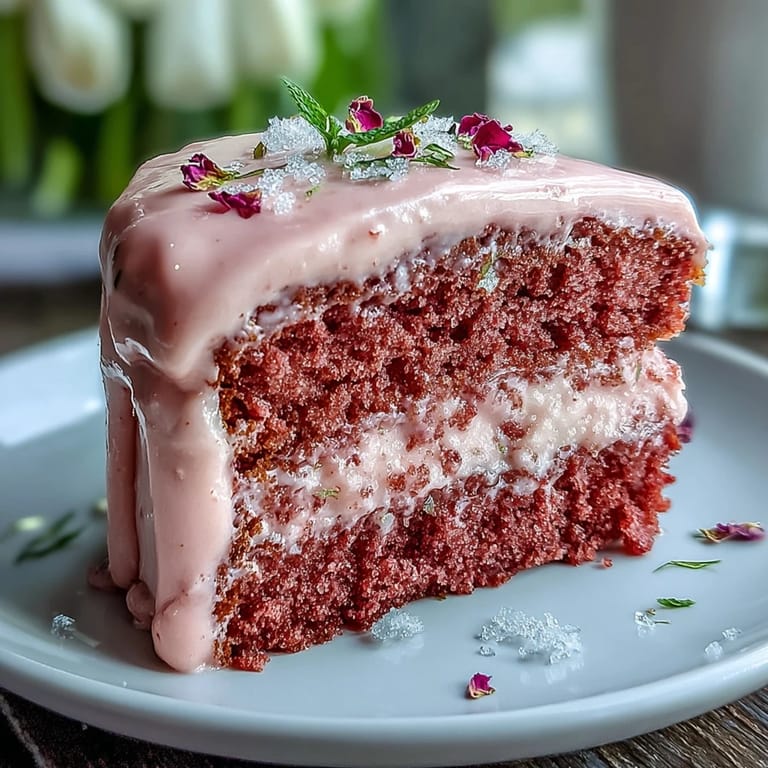
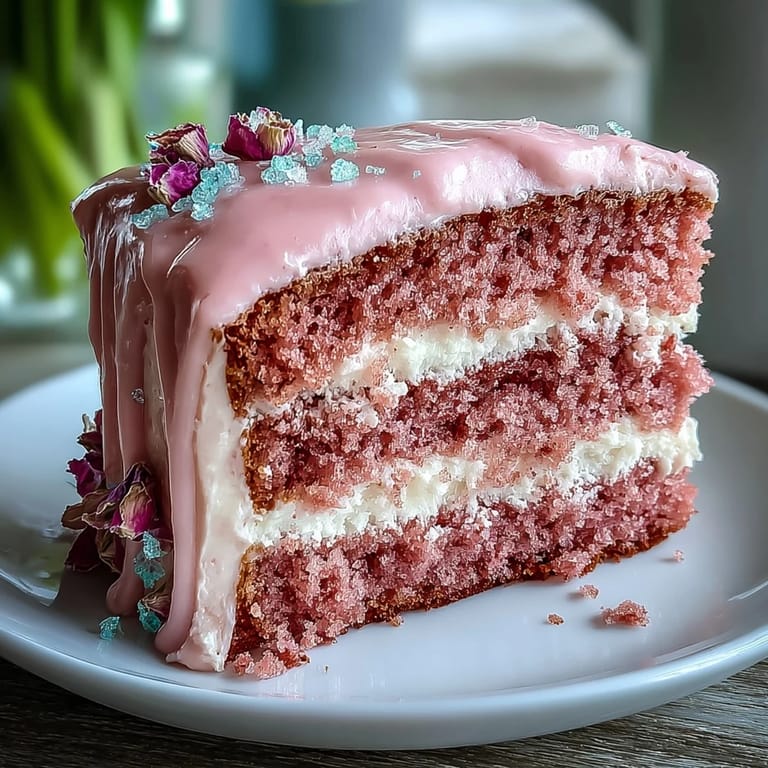
 There is something inherently joyful about baking a cake that glows pink and shimmers gold, especially when the kitchen hums with laughter and anticipation. The scent of rosé wine swirling with warm vanilla always nudged me to smile as I whisked the batter, watching it blush just the right shade. I once made this Rosé Velvet Cake well before I ever hosted a bridal shower—simply because I fell in love with its playful spirit and delicate flavors. There’s an art to letting the cake layers cool as daylight filters through, almost as if the cake itself is celebrating right along with you. And when you crown it with that gold drip? A hush falls, and someone always gasps in delight.
When I first baked this for my cousin’s bridal shower, I managed to get frosting on every available surface—even my elbow—because we were all too busy debating cake toppers and playlist selections. That afternoon, the cake drew everyone into the kitchen, forks hand in hand, as conversations bubbled over and someone turned up the music. It was less about impressing, more about sharing bites and secrets as the gold shimmer caught the sunlight. Recipes like this one seem to turn a gathering into a memory that sticks. It’s the kind of cake people thank you for days later.
Ingredients
- All-purpose flour: The backbone for tender velvet layers—sifting helps avoid pockets and ensures an even crumb.
- Granulated sugar: Sweetens but also helps the cake’s blush glow through—make sure it’s fine, not coarse.
- Baking soda and baking powder: A duo that gives the cake its perfect lift—double-check freshness before measuring.
- Salt: Rounds out the sweetness and keeps flavors balanced—don’t skip it, even if it’s just a pinch.
- Unsweetened cocoa powder: Not much, but just enough to lend depth—sift well to avoid bitter clumps.
- Unsalted butter: Room temperature is non-negotiable for dreamy, fluffy texture—plan ahead.
- Buttermilk: Makes the crumb soft and adds slight tang—a must for velvet cakes.
- Rosé wine: Choose a fruity, not too dry bottle—you really will taste the difference in those blush layers.
- Eggs: Bind everything together—set them out early so they mix in smoothly.
- Vanilla extract: Warms up the rosé and chocolate notes—real vanilla makes a world of difference.
- White vinegar: Reacts with cocoa and buttermilk for that signature velvet texture—don’t worry, you won’t taste it.
- Pink food coloring gel: A little goes a long way—add slowly to get that perfect bridal blush.
- Cream cheese: Essential for a rich, tangy frosting—softened first for lump-free spreading.
- Powdered sugar: Sift or whisk to avoid clumpy icing—this keeps the frosting cloudlike.
- Heavy cream: Adds silkiness to the gold drip—room temperature blends best.
- White chocolate chips: Make sure they’re high quality for a shiny drip—cheap ones can seize or get grainy.
- Edible gold luster dust: This is what turns the drip regal—use sparingly, a little really pops.
- Vodka or clear extract: Just a touch to liquefy the gold for painting—don’t worry, the alcohol evaporates off.
- Edible decorations (flower petals, berries, gold leaf): These finishing touches transform the cake into a stunner, but even plain it’s a showstopper.
Tired of Takeout? 🥡
Get 10 meals you can make faster than delivery arrives. Seriously.
One email. No spam. Unsubscribe anytime.
Instructions
- Preheat and Prep:
- Set your oven to 350°F and line three 8-inch pans with parchment—smear a little butter around the rims and bottoms for insurance against sticking.
- Sift Dry Ingredients:
- Whisk flour, cocoa, baking soda, baking powder, and salt together as the cocoa’s aroma calls everyone to peek into the bowl.
- Cream Butter and Sugar:
- Let the mixer do the work until the mixture turns pale and fluffy—this is when I can never resist swiping a taste.
- Add Eggs and Vanilla:
- Crack eggs in one by one (it sounds like a gentle tap on marble countertops), and pour in vanilla until silky.
- Mix Wet Ingredients:
- Pour buttermilk, rosé, and vinegar into the creamed base—it might look curdled but don’t worry, it’ll all smooth out.
- Combine and Color:
- Alternate your dry ingredients into the wet, mixing just until streaks disappear; now swirl in pink food gel bit by bit, stopping for the perfect blush.
- Bake the Layers:
- Divide evenly among pans and bake till a toothpick emerges clean, the kitchen filling with a scent that somehow feels festive already.
- Cooling Moment:
- Let cakes rest ten minutes, then cool completely on racks—a crucial step, or the frosting will slide right off.
- Frosting Time:
- Beat butter and cream cheese until smooth, then sift in powdered sugar as it billows—splash in rosé and whip until fluffy.
- Stack and Crumb Coat:
- Level layers if peaked, then layer with frosting; smear a thin crumb coat all over, chill to set, then finish with a final swath of creamy icing.
- Create the Gold Drip:
- Melt white chocolate and cream until smooth and barely warm, then drip along cake edges for that showy waterfall effect.
- Paint It Gold:
- Swirl gold dust with vodka, paint gently over the cooled drip with a soft brush—stand back to admire the shimmer.
- Chill and Serve:
- Pop the cake in the fridge for at least thirty minutes so everything sets, then decorate with edible petals or gold leaf before serving to applause.
 Save to Pinterest
  Save to Pinterest
 One moment stands out: the cake was finally done, gold drip in place, and we were dotting petals around the border as my friend’s daughter circled the kitchen humming. Suddenly she declared this the ‘princess cake,’ and insisted on carrying it (with both hands and three grownups hovering)—her wide eyes caught every glimmer under the skylight. That’s when I realized this cake isn’t just dessert—it’s an experience, gathered in smiles and ribbons of laughter. There’s pure happiness in making something beautiful together. That memory keeps me reaching for the mixing bowl, again and again.
Choosing Your Rosé Is Part of the Fun
I learned that the flavor of rosé truly shines through—go with a bottle you’d actually drink, fruity but not overly sweet. If you don’t want to use wine, sparkling grape juice makes a fantastic stand-in and keeps the cake festive for all ages. One day I even tried a splash of strawberry juice for color and it worked beautifully. Just remember: if you wouldn’t pour a glass of it, don’t pour it into your cake, either.
Decorating Without Stress
The first time I tried the gold drip, my hands shook and chocolate dribbled a bit wild, but honestly, the imperfect rivers ended up even prettier. Using a squeeze bottle gives more control, but a regular spoon creates charmingly unique cascades. Don’t be afraid to add your favorite edible flowers—violets and rose petals look as elegant as gold leaf. Even a few fresh berries along the base bring a pop of color that makes the cake feel lush and abundant.
Make-Ahead Magic (and Last-Minute Fixes)
Cake layers can be baked a day ahead and wrapped tightly—sometimes, chilling overnight actually helps with assembly, making frosting a breeze. If you run short on time, the crumb coat sets up faster in the freezer (10 minutes flat). Kept covered, the finished cake holds up well for several hours, so you can focus on everything else guests never see.
- Have a backup batch of frosting ready—just in case.
- A touch of extra pink food gel can revive a faded color.
- Don’t stress over perfect gold lines—a little shimmer goes a long way.
 Save to Pinterest
  Save to Pinterest
 This Rosé Velvet Cake brings a sense of occasion to any gathering—and sometimes, sharing a dazzling dessert is the best way to celebrate each other. May your cakes glitter and your conversations linger long after the last crumb disappears.
Recipe FAQs
- → How do I deepen the rosé flavor?
Brush cooled layers lightly with reserved rosé wine before stacking or fold an extra tablespoon of rosé into the frosting to amplify the floral, fruity notes without thinning the buttercream.
- → How can I make the cake non-alcoholic?
Substitute rosé with sparkling grape juice or a concentrated grape reduction. Use the same volume called for in the batter and frosting to maintain acidity and moisture balance.
- → Why is my frosting runny and how do I fix it?
Runny frosting usually means ingredients were too warm or too much liquid was added. Chill the bowl for 10–15 minutes, then beat again. Add sifted powdered sugar gradually to thicken until you reach a spreadable consistency.
- → What's the best way to get a smooth crumb coat?
Apply a thin layer of frosting to seal crumbs, chill the cake for 20–30 minutes to set, then apply a cold, firm second coat. Use an offset spatula and a bench scraper for even sides.
- → How do I make a stable white chocolate drip?
Heat white chocolate with heavy cream in short bursts, stirring until glossy and slightly cooled to room temperature. Test drip consistency on the side of a bowl before applying to a chilled cake to control flow.
- → Tips for painting the gold finish on the drip?
Mix edible gold luster dust with a few drops of vodka or clear extract to a paint-like consistency. Use a clean, food-safe brush and tap gently—work in thin layers to avoid dissolving the chocolate surface.