 Save to Pinterest
 My neighbor knocked on my door with a box of mini cheesecakes last spring, and I remember thinking how clever the whole thing was—creamy, elegant, but small enough that you could eat three without feeling guilty. She'd made them for her housewarming party, and honestly, they disappeared faster than the champagne. That's when I realized these little bites were the secret weapon for any gathering where you want people to feel genuinely delighted. A few months later, I made my own batch for a friend's birthday, and watching someone's face light up when they bit into that buttery crust gave me the answer I'd been looking for about what dessert really means.
I'll never forget the first time I brought these to a potluck—someone asked for the recipe before they'd even finished the first one, and that moment taught me that simple, well-executed food is way more memorable than anything complicated. The fact that I could make two dozen in under an hour, chill them while everyone arrived, and then spend the evening talking instead of fussing in the kitchen felt like actual magic.
Ingredients
- Graham cracker crumbs: Use fresh ones if you can—stale crackers make the crust taste dusty, and it's worth the thirty seconds to crush them yourself.
- Unsalted butter: Melted and warm binds everything together and gives you that perfect sandy texture that holds when you press it down.
- Cream cheese: Let it sit on the counter for at least thirty minutes before mixing, or you'll end up with lumps that no amount of beating can fix.
- Sour cream: This is what stops them from being dense little hockey pucks and keeps them tender and slightly tangy.
- Eggs: Add them one at a time and actually wait between each addition—rushing this part is how you end up with overmixed batter that bakes up tough.
- Vanilla extract: A real splash of this makes such a difference in something so small, so don't skip it or use the imitation stuff.
Tired of Takeout? 🥡
Get 10 meals you can make faster than delivery arrives. Seriously.
One email. No spam. Unsubscribe anytime.
Instructions
- Prepare your pan and preheat:
- Set your oven to 325°F and line your mini muffin tin with paper liners—they peel away so cleanly and make everything feel intentional. This temperature is important because it bakes them gently enough that the centers stay creamy instead of turning into rubber.
- Build your crusts:
- Toss the graham cracker crumbs with sugar and melted butter until it looks like wet sand, then press about a teaspoon firmly into each liner. The pressure matters here—a loose crust will crumble when you bite into it, so take your time and pack it down.
- Mix the filling to silky perfection:
- Beat your softened cream cheese until it's completely smooth and there are no streaks, then gradually add sugar and mix until the texture is light and fluffy. Add the eggs one at a time, waiting a few seconds between each one, then fold in the sour cream, vanilla, flour, and salt until everything is just combined—overmixing brings air bubbles that crack on top.
- Fill and bake with patience:
- Spoon the filling over each crust until it's nearly at the rim, then slide the whole tin into the oven for 18 to 20 minutes until the centers jiggle just slightly when you shake the pan gently. You want them to look barely done because they'll set up as they cool and you'll get that perfect creamy bite.
- Cool in stages:
- Let them rest in the pan for 15 minutes so they don't crack from the temperature shock, then transfer them to a wire rack to cool completely. Once they're cool, chill them in the refrigerator for at least an hour before you even think about eating one—patience here pays off with the best texture.
 Save to Pinterest
 There was this moment at a dinner party where my friend's eight-year-old daughter asked if she could have another one, and her mom said yes, and they both just sat there eating mini cheesecakes and talking about her day. That's when I understood that food this good somehow makes space for the people around it to actually connect instead of just performing.
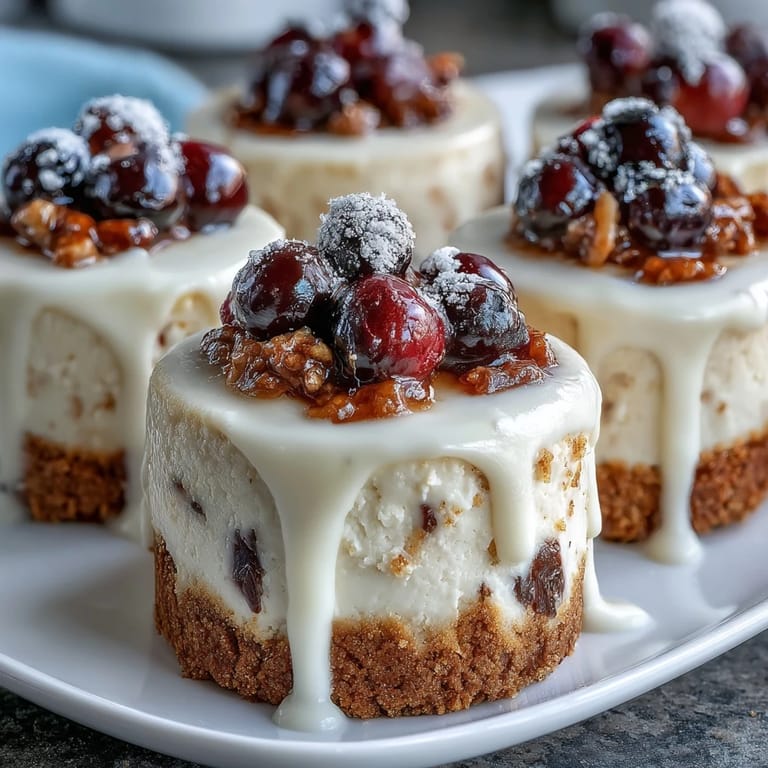
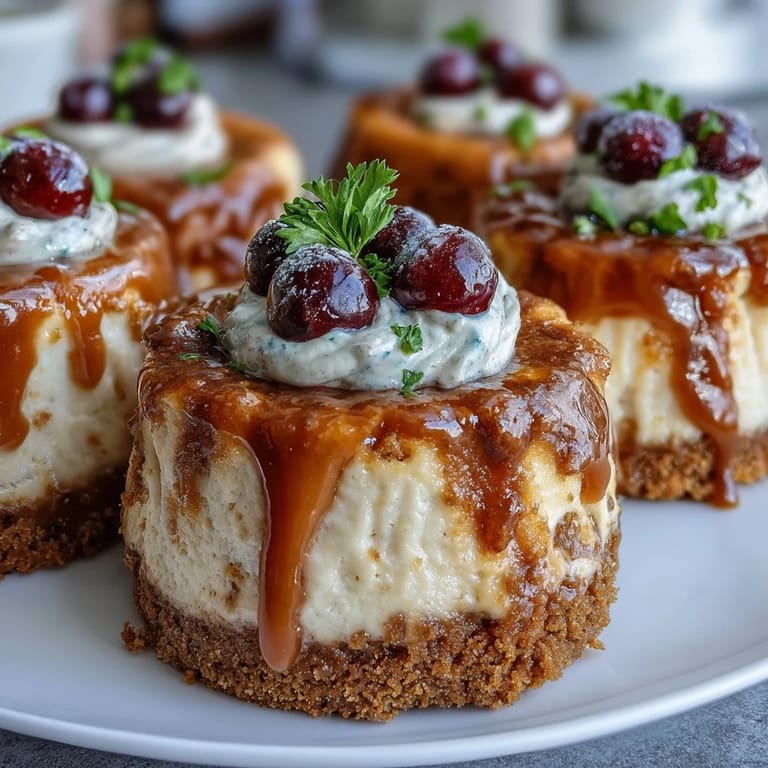
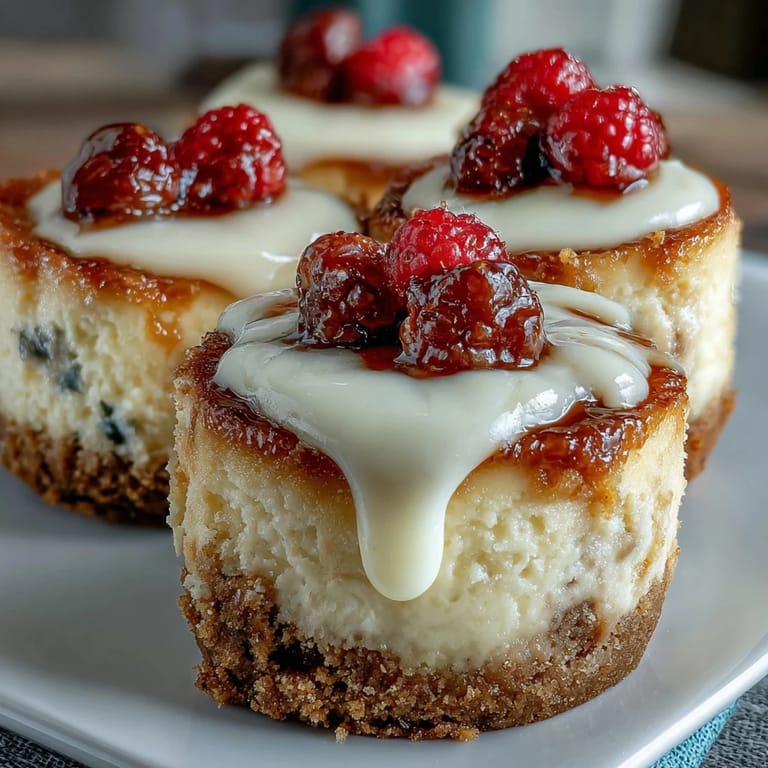
Topping Ideas That Actually Work
The beauty of these little things is that you can dress them up however matches your mood or whatever you have in your kitchen. Fresh berries are the obvious choice because they're bright and tart against the sweet, creamy filling, but a spoonful of good fruit preserves works just as well and looks intentional in a fancy way. I've done chocolate shavings when I was feeling decadent, and whipped cream with a tiny squeeze of lemon when the weather was warm. The point is to add toppings just before serving so the crust stays crisp and everything tastes fresh.
Making Them Ahead (The Real Lifesaver)
These are actually better the next day because the flavors settle and the texture becomes even more custard-like and delicious. You can make them up to 24 hours ahead, keep them in the refrigerator in an airtight container or wrapped loosely in plastic wrap, and then just add your toppings right before people arrive. This is honestly why they're perfect for entertaining—you get to do all the work when you're calm and focused, then you get to be present when everyone shows up instead of stressed in the kitchen.
Small Tweaks That Keep Things Interesting
Once you nail the basic recipe, it's fun to play with it in small ways that don't actually make it harder. A teaspoon of lemon zest mixed into the filling adds brightness without changing anything else, and a pinch of cinnamon in the crust tastes like fall even in summer. I've also made them with a drizzle of salted caramel on top, and a friend of mine swears by adding a tiny bit of espresso powder to make everything taste richer and deeper. These tweaks are just invitations to make the recipe your own, not complicated instructions you have to follow.
- Lemon zest or a splash of lemon juice transforms the whole thing into something bright and springy.
- A pinch of almond extract in place of some of the vanilla makes people ask what the secret ingredient is.
- Brown the butter before mixing it with the crumbs for a crust that tastes toasted and nutty instead of just sweet.
 Save to Pinterest
 Making these feels like you're in on a secret about how to make people happy with food that's actually simple. They're small enough to feel like you're getting away with something, and special enough to make any moment feel intentional.
Recipe FAQs
- → What type of crust is used?
A crisp graham cracker crust made with crumbs, sugar, and melted butter forms the base.
- → How should the filling be prepared?
The filling is a smooth blend of cream cheese, sugar, eggs, sour cream, vanilla, flour, and a pinch of salt, mixed until creamy.
- → Can these cheesecakes be made ahead?
Yes, they can be prepared a day in advance and refrigerated to allow flavors to meld.
- → What are some suggested toppings?
Fresh berries, fruit preserves, whipped cream, and chocolate shavings add flavor and presentation appeal.
- → Is there a gluten-free option?
Use gluten-free graham crackers and flour to make these suitable for gluten-free diets.